+86-18367343973
 English
 Español
 عربى
عربى
Article Directory
- 1 Assessing Your DIY Skills for SPC Flooring Installation
- 2 Essential Tools and Materials You Will Need
- 3 Critical Pre-Installation Precautions and Subfloor Preparation
- 4 The Step-by-Step Installation Process
- 5 Common DIY Mistakes and How to Avoid Them
- 6 FAQ
- 6.1 What is the hardest part of installing SPC flooring yourself?
- 6.2 Can I install SPC flooring over my existing ceramic tile?
- 6.3 Is it okay to install SPC flooring in a bathroom or kitchen?
- 6.4 How long does it take for a DIYer to install SPC flooring?
- 6.5 Should I install SPC flooring myself or hire a professional?
SPC (Stone Plastic Composite) flooring has become a favorite among homeowners and DIY enthusiasts due to its remarkable durability, waterproof properties, and user-friendly installation systems. A common question that arises is: can you truly install it yourself? The answer is a resounding yes for those with moderate DIY skills, but a successful DIY SPC flooring installation hinges on meticulous preparation and understanding critical precautions. This comprehensive guide will walk you through the entire process, from assessing your suitability for the job to the final plank, ensuring your project is a resounding success. Manufacturers like Haining Yunxi New Material Technology Co., Ltd. design their locking systems with the DIYer in mind, but emphasize that proper subfloor preparation is the non-negotiable foundation for a flawless finish.
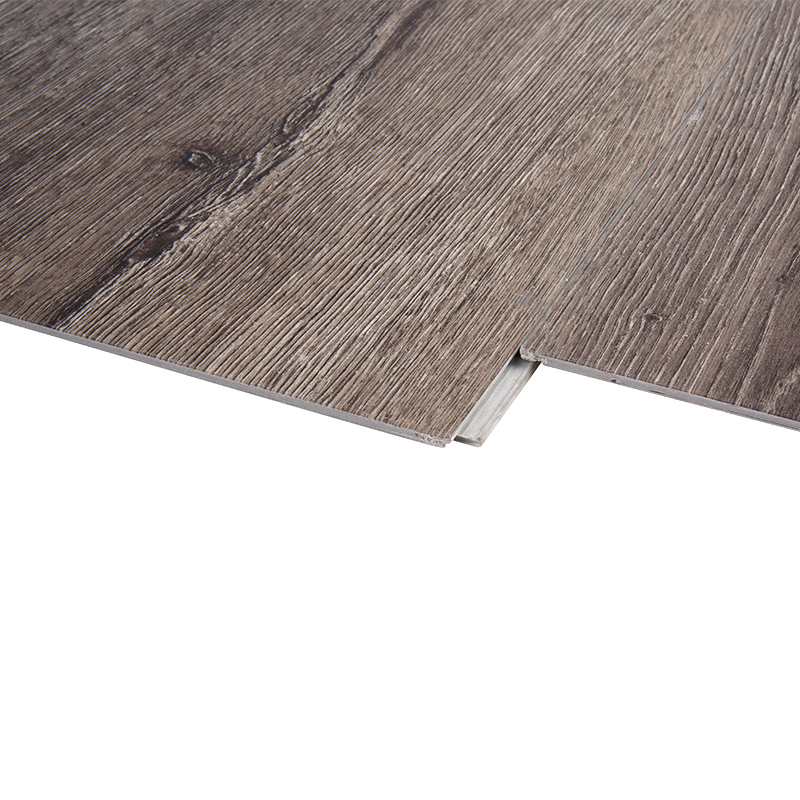
Waterproof, moisture-proof and impact-resistant home decoration SPC flooring Thickness 5 YXSPC22950
Assessing Your DIY Skills for SPC Flooring Installation
Before purchasing your first plank, it's crucial to conduct an honest self-assessment. While SPC flooring is designed for easier installation than traditional hardwood or tile, it still demands precision, patience, and basic tool proficiency. A successful install is less about brute force and more about careful planning and execution.
- Basic Tool Handling: You should be comfortable using tools like a tape measure, utility knife, rubber mallet, and a pull bar. Experience with a tapping block is a plus.
- Attention to Detail: The locking mechanisms require clean, precise cuts and careful angling of the planks to engage properly. Rushing this process can damage the locks.
- Physical Capability: The project involves repeated kneeling, bending, and lifting boxes of flooring, which can be physically demanding over several hours.
- Problem-Solving Mindset: You will likely encounter obstacles like door jambs, corners, and pipes. The ability to measure and cut accurately around these is essential.
Essential Tools and Materials You Will Need
Gathering the right tools before you begin is a critical precaution that prevents mid-project frustration and errors. Having a dedicated workspace for cutting will also improve your efficiency and accuracy. While the exact tools can vary, this list covers the fundamentals for a standard how to install SPC vinyl plank flooring project.
- SPC Flooring: Purchase 7-10% extra to account for cuts and mistakes.
- Underlayment: Essential for moisture protection, sound reduction, and smoothing minor subfloor imperfections.
- Measuring & Marking: Tape measure, carpenter's square, and a pencil.
- Cutting Tools: A utility knife with extra blades for scoring and snapping, or a jigsaw/electric table saw for complex cuts.
- Installation Kit: Rubber mallet, tapping block, and pull bar for securely locking planks together without damaging the edges.
- Preparation Tools: Broom, vacuum, and potentially a concrete patching compound or self-leveler if your subfloor requires it.
- Safety Gear: Knee pads, safety glasses, and ear protection if using power tools.
Critical Pre-Installation Precautions and Subfloor Preparation
This is the single most important phase of the entire project. Neglecting subfloor preparation is the leading cause of failed DIY SPC flooring installations, resulting in clicking sounds, cracked joints, and an uneven surface. The golden rule is that the subfloor must be perfectly clean, flat, dry, and structurally sound.
- Cleanliness: Sweep and vacuum thoroughly. There must be zero dust, debris, or old adhesive residue.
- Flatness: The subfloor must not deviate more than 3mm over a 1-meter radius. Use a long straightedge to check for high and low spots.
- Dryness: For concrete subfloors, perform a moisture test. The relative humidity should be below the manufacturer's specification (typically under 75%).
- Stability: Ensure there is no vertical movement or flex in the subfloor when walked upon.
Addressing Common Subfloor Issues
Most subfloors require some level of remediation before the underlayment and flooring can be laid. Understanding how to handle these issues is a key part of SPC flooring installation tips for a professional-looking result.
| Subfloor Type | Common Issue | Solution |
| Concrete | Moisture, unevenness, cracks | Apply a vapor barrier underlayment, use self-leveling compound for low spots, and patch cracks. |
| Plywood/OSB | Protruding nails/screws, squeaks, gaps | Counter-sink all fasteners, secure loose panels with additional screws, fill large gaps with a floor-leveling compound. |
| Existing Vinyl/Tile | Uneven surface, deep grout lines | Ensure it is fully adhered. Use an underlayment to bridge minor imperfections and fill deep grout lines. |
The Step-by-Step Installation Process
With your subfloor perfectly prepared, you can begin the rewarding process of laying your new floor. Following a methodical approach will ensure a tight, professional-looking lock and a beautiful final appearance. This process outlines the fundamental steps for a successful SPC vinyl plank flooring installation guide.
- Step 1: Acclimate the Flooring. Leave the boxes of SPC flooring in the room where they will be installed for at least 48 hours. This allows the material to adjust to the room's temperature and humidity.
- Step 2: Lay the Underlayment. Roll out the underlayment according to the manufacturer's instructions, ensuring the seams are tightly butted and taped.
- Step 3: Plan Your Layout. Decide the direction of the planks (typically parallel to the main light source). Measure the room's width to ensure the first and last rows will not be less than 2-3 inches wide. Adjust your starting point if necessary.
- Step 4: Install the First Row. Start in a corner, placing the planks with the tongue side facing the wall. Use spacers against the wall to maintain a consistent 1/4-inch expansion gap around the entire perimeter.
- Step 5: Continue Installation. Stagger the end joints of adjacent rows by at least 6-8 inches for a natural look and structural integrity. Use the tapping block and rubber mallet to gently lock the long and short ends of each plank.
- Step 6: Cut and Fit Final Planks. Measure and cut planks to fit at the end of rows and around obstacles. A utility knife works for straight cuts, while a jigsaw is better for notches around door jambs or pipes.
Common DIY Mistakes and How to Avoid Them
Even experienced DIYers can make mistakes. Being aware of the most common pitfalls is your best defense against them. These common mistakes when installing SPC flooring can compromise the look and longevity of your floor, but are easily avoided with careful attention.
- Ignoring the Expansion Gap: Failing to leave a gap around the room's edges can cause the entire floor to buckle when it expands. Always use spacers.
- Forcing the Locking System: If a plank doesn't snap in easily, don't force it with the mallet. Check for debris in the groove or misalignment. Forcing it can break the lock.
- Insufficient Staggering: Aligning end joints too closely creates a weak point and looks unprofessional. Follow the "6-8 inch rule" strictly.
- Poor Subfloor Preparation: We cannot stress this enough. A dirty or uneven subfloor will telegraph through the new floor and cause premature failure.
- Damaging the Locking Mechanism: Always use a tapping block. Hitting the plank directly with a hammer will chip and break the delicate edges.
Professional vs. DIY Installation: A Quick Comparison
To help you make a fully informed decision, here is a comparison of the key differences between tackling the project yourself and hiring a professional. This is particularly relevant for those considering an SPC flooring installation on stairs, which is a significantly more complex task.
| Aspect | DIY Installation | Professional Installation |
| Cost | Lower (material cost only) | Higher (material + labor) |
| Time Commitment | Significant (weekend project) | Minimal (supervision only) |
| Skill Level Required | Moderate | Handled by the professional |
| Warranty | Manufacturer warranty only | Often includes a workmanship warranty |
| Complex Situations | Challenging (stairs, uneven floors) | Easily handled with experience |
FAQ
What is the hardest part of installing SPC flooring yourself?
Most DIYers agree that the most challenging aspect is not the actual laying of the planks, but the subfloor preparation. Achieving a perfectly flat, clean, and dry surface requires patience, the right materials (like self-leveler), and meticulous attention to detail. The second most common challenge is dealing with complex room layouts, such as fitting planks around multiple doorways, cabinets, or pipes, which requires precise measuring and cutting. Haining Yunxi New Material Technology Co., Ltd. notes that proper preparation accounts for 80% of the project's success, as their locking systems are engineered for simplicity once the foundation is correct.
Can I install SPC flooring over my existing ceramic tile?
Yes, you can install SPC flooring directly over ceramic tile, which can save immense time and effort on demolition. This is a great DIY SPC flooring installation shortcut, but with critical precautions. The existing tile must be firmly attached with no loose pieces. The surface must be flat; any lippage (where one tile is higher than its neighbor) or deep grout lines may need to be filled with a floor-leveling compound to prevent them from telegraphing through the new SPC floor. A quality underlayment is also recommended to help smooth out minor imperfections and provide acoustic benefits.
Is it okay to install SPC flooring in a bathroom or kitchen?
SPC flooring is an excellent choice for bathrooms, kitchens, and laundry rooms due to its 100% waterproof core. Unlike laminate or engineered wood, spills and moisture will not cause the planks to swell or warp. This makes a DIY SPC flooring installation in these areas a very viable and rewarding project. For a completely waterproof seal, some DIYers choose to apply a 100% silicone sealant along the edges and seams in these wet areas, though this may void the manufacturer's warranty for a floating floor, so it's essential to check the guidelines first.
How long does it take for a DIYer to install SPC flooring?
The timeline varies significantly based on the room's size, complexity, and your experience level. For a typical DIYer, a standard 12'x15' bedroom might take a full weekend. This includes time for subfloor preparation (half a day), acclimating the flooring, the actual installation (one day), and installing trim and transitions (half a day). More complex spaces with many corners, obstacles, or a large, open-plan area will take longer. Rushing the process is a primary cause of the common mistakes when installing SPC flooring, so it's always better to overestimate your time.
Should I install SPC flooring myself or hire a professional?
This decision boils down to your budget, confidence, and the project's complexity. DIY is a great option if you are handy, have the time, and are working on a straightforward, rectangular room. It offers significant cost savings. You should strongly consider hiring a professional if the project involves complex elements like SPC flooring installation on stairs, multiple floor transitions, significant subfloor leveling, or if you are simply short on time and want a guaranteed result backed by a workmanship warranty. Companies like Haining Yunxi New Material Technology Co., Ltd. supply products suitable for both markets, ensuring high performance whether installed by a seasoned pro or a meticulous DIYer.


 YXWPC16018")
